Share this

As I continue to get back into woodworking, it quickly became apparent that my shop — also known as the basement — was missing two very useful and also very important fixtures: a proper workbench and a woodworker’s vise.
I’m not going to tackle the lack of a workbench in this post however — that’s a much larger undertaking. Instead, let’s take a look at an easy do-it-yourself twin-screw vise that you can easily make in a weekend.
You will need the following materials:
- 2x 3/4 in. hex head bolt, 8 in. long
- 2x washers
- 2x 3/4 in. nuts
- Adhesive backed sheet of cork
- 5/4 hardwood at least 5 in. wide and 4 ft long
- epoxy
- 1 1/4 in. diameter wooden dowel, at least 24 in. long
- 2x 1.5 in. PVC Tee fitting
The inspiration for the vise came from this video by One Minute Workshop, but I’ve made a few changes: cork instead of leather to line the jaws, dowels for the handles, and most importantly, I’ve reversed the direction of the bolts so that no one in the shop walks into or snags themselves on them.
PREPARE THE STOCK
You’ll want beefy jaws on your vise to prevent bowing. Start with 5/4 stock and plane it down to a full 1 inch thick. You’ll want the top edge to be square to the faces of the jaws. If you have a jointer, first joint the width of the stock, then joint the edge. These two edges are now your reference faces, be sure to add witness marks to keep track of them. When this is done, it’s time cut your jaws to size; mine are 16 in. long and 4-1/2 in. high and are sized to fit my bench. What bench you say? I’m using part of my miter saw station as a workbench … for now and the vise is mounted so the top of the jaws are flush with the top surface of the bench.
The Plans

There’s a simple measured drawing available for download. Both jaws are represented as a single part, with measurements for either holes (rear jaw) or slots (front jaw).
Notes:
- All measurements are in inches
- Slots are on the front jaw only
- Bolt holes are on the rear jaw only
- Mounting holes for the rear jaw have been omitted for clarity. Use two carriage bolts of suitable length in counterbored through holes in the rear jaw to mount to your table.
LAYOUT
The layout for the front and back jaws are similar but differ in one important aspect: the front jaws have slots to allow for movement of the jaw when clamping irregularly shaped parts. Be sure to keep track of which jaw you’re working on!
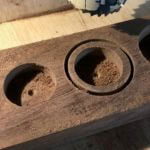
Let’s start with the rear jaw. Mark holes for the two 3/4 in. bolts that serve as the vise screws. These should be vertically centered and 2 in. in from either end. Measure the thickness of a 3/4 in. nut and using a Forstner bit, drill a hole at each location as deep as the nuts are thick. Next, thread a nut onto one of the bolts so that a portion of the bolt protrudes past the bottom of the nut. Insert the protruding portion of the bolt into one of the holes so that the nut is touching the jaw face. Trace around the nut completely, then set the nut and bolt aside.
Using a sharp chisel, carefully remove material up to the outline of the nut created in the previous step. The goal is to capture the nut and prevent it from turning when the vise is opened or closed. Depending on your material this may take awhile and if you’re having trouble don’t be afraid to stop and sharpen your chisels when necessary. Take your time and make sure the nut is flush or just below the surface.
Repeat for the other end of the jaw.
The front jaw is much simpler. Mark holes for the bolts as above — vertically centered and 2 in. in from either end. Next, make a mark 3/8 in. to the left of that mark and again 3/8 in. to the right. These two offset marks define the locations where you will drill to create a slot. More on that below.

MILLING

Continuing with the front jaw, it’s time to mill the slots. Using a 3/4 in. Forstner bit, carefully drill two holes on the marks you made in the previous step. Be sure to use a sacrificial backer board to prevent tearout. Repeat for the other end as well.
Using a wood rasp or a jigsaw, create a slot by removing the waste material between the two holes previously drilled. Take your time to get a smooth flat wall top and bottom so that the jaw can slide side to side smoothly.
Repeat for the other end of the jaw.
Returning to the rear jaw, it’s time to create the through-holes for the bolts. Use a 3/4 in. drill bit — a Forstner bit will do fine here — to drill completely through the rear jaw. Use the divot left by the previous drilling operation as guide to ensure the hole is centered within the recess for the nut.
Sand both faces to remove any splinters, then line the inside of the jaws with self-adhesive cork to increase “grippiness”. Note: the recesses for the nuts are on the opposite side of the jaw from the cork (e.g., they’re on the back face of the rear (fixed) jaw.
Test fit
If you’re even a bit like me, you’re ready to try it out. Assembly is straightforward and with a couple of clamps and a good sized adjustable wrench you can give it a try.
If you squint really hard, it looks a lot like a Moxon Vise, just not as fancy — or expensive!

MAKE THE HANDLES

If you did the test fit above it quickly becomes apparent that using an adjustable wrench or even a ratchet is a sub-optimal approach for opening and closing this vise.
I chose to make some traditional looking handles using 1.5 in. PVC Tee fittings, a dowel from the local hardware store and some two-part epoxy.
First, line the inside of the Tee fitting with blue tape to constrain the epoxy to where the bolt will be epoxied. Be sure to press the tape into the opening to ensure a smooth path for the dowel.
Next, find a way to clamp the Tee fitting so that it is level along its length and the Tee portion is vertical. The next step is to insert the bolt, head first and epoxy it in place so it’s worth taking some time to figure out a way to hold the bolt in place. I tried two different approaches. For the first assembly I stood there and held the bolt in place until the expoy set, about 5 minutes. I had to contend with some sag during the curing process but was able to prop the bolt (nearly) vertical.
I thought I’d be smart for the second assembly and used some 1/8 in. metal rod stock to pin the bolt in place. However, since I didn’t get the metal pins in evenly, when I hung the bolt vertically to cure, the PVC was not perfectly inline with the bolt. The resulting assembly is still quite functional but the base of the Tee is not parallel with the jaw, leaving a gap to remind me that learning opportunities are plentiful.
While the epoxy is curing it’s time to make the handles. Cut two 12 sections from the dowel stock for use as the handles and sand them smooth. I’d advise to avoid the portion of the dowel that may have a pricing sticker on it. Ask me why…
I made my handles 12 in. long, which turned out to be a little long; the handles can hit each other in certain orientations. A shorter handle should minimize handle collisions so use whatever length works for you. I may shorten mine.
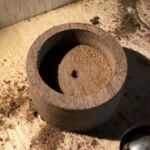
I wanted a nice contrasting wood for the end caps and was able to find some leftover mesquite — bingo! The idea here is to create a recess in which the dowel would fit snugly and could be secured with wood glue. Since I don’t have a lathe and didn’t have a bandsaw capable of cutting tight circles I made mine on the drill press using a Forstner bit and a hole saw. Some light sanding completes the task.
Finishing and mounting
That’s it for construction! Time to apply a finish to protect the wood. Choosing a finish is a personal choice so use what you’re comfortable with or have readily available. I really like the look of a mineral oil and beeswax finish and had a bottle of Howard’s Butcher Block Conditioner on the shelf so I wiped on a couple of coats and let it soak in.
Once your finish is dry, it’s time to decide where to mount it. I chose the left side of my miter saw workstation and mounted it with two suitably-sized carriage bolts — ignore the two smaller holes, those were another learning opportunity.
Don’t forget to insert the nuts into their proper locations before mounting the rear jaw. It’s not necessary to epoxy the nuts in place but can be, if so desired. Be sure not to get epoxy in the threads.
Put a washer on each bolt and pass through the slots in the front jaw. Thread into the now-trapped nuts in the rear jaw and revel in your new DIY Budget Twin Screw Vise!
Now go cut some dovetails!


